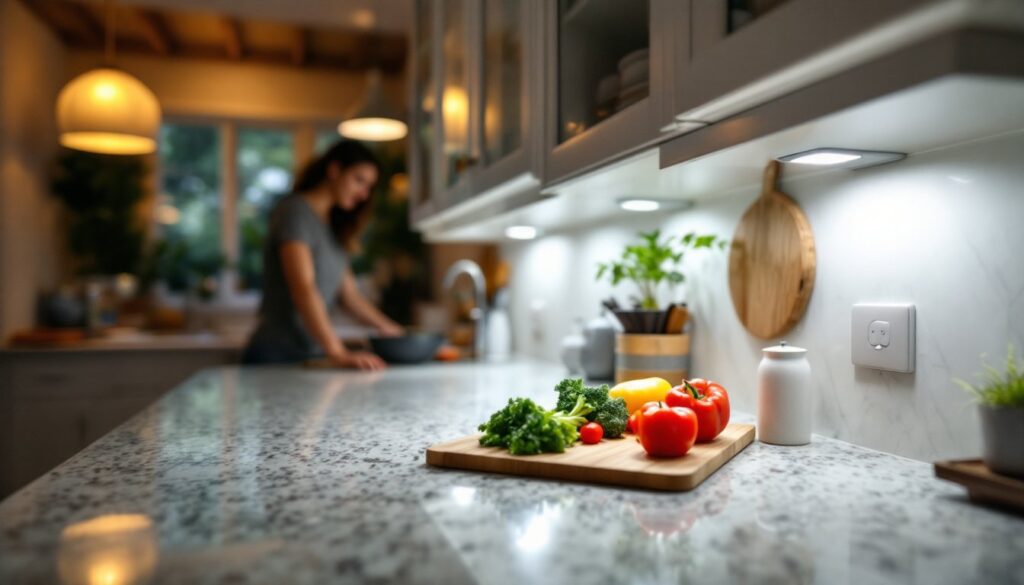
Smart home technology has finally made its way into the kitchen workspace, and under cabinet lighting with sensor capabilities is leading the charge. Unlike traditional under cabinet lights that stay on until you manually flip a switch, motion sensor cabinet lights and motion activated under cabinet lighting systems respond to your presence, hands full of groceries? No problem. The lights are already on. Whether you’re considering a rechargeable motion sensor cabinet light or a hardwired system, sensor-equipped under cabinet lighting transforms how you work in your kitchen while cutting energy waste. In 2026, these smart fixtures have become more affordable and easier to install than ever, making them a practical upgrade for any DIY homeowner ready to take the plunge.
Table of Contents
ToggleKey Takeaways
- Motion-activated under cabinet lighting automatically turns on when you’re at the countertop, eliminating fumbling for switches and improving kitchen safety while keeping your hands free.
- Under cabinet lighting with sensor technology reduces energy waste by activating only when needed, with built-in timers (typically 30 seconds to 5 minutes) that automatically turn off forgotten lights.
- Rechargeable motion sensor cabinet light models offer flexibility for renters and testing, while hardwired systems provide permanent, unlimited power—choose based on your home ownership status and installation comfort level.
- Optimal task lighting requires 300–500 lumens per linear foot, a 6–8 foot sensor range, and color temperatures between 3,000K (warm white) and 5,000K (cool white) to balance comfort and visibility.
- DIY installation of rechargeable fixtures takes just 15–30 minutes per unit with basic tools and no electrical expertise, while hardwired systems require either licensed electrician work or advanced electrical knowledge.
- Motion sensor fixtures are low-maintenance; dust buildup on lenses reduces brightness without affecting detection, and simple troubleshooting like adjusting sensor angle or sensitivity dial solves most common issues.
Why Motion-Activated Under Cabinet Lighting Makes Sense
Motion sensor cabinet lights aren’t just a convenience play, they’re genuinely practical. When you’re prep-cooking at the counter or washing dishes, your hands are occupied. A motion activated under cabinet lighting system detects your movement and turns on automatically, eliminating the fumble for a light switch or the blind reach across countertops. That’s a small safety win right there.
Energy efficiency matters too. Unlike always-on fixtures, motion sensors activate only when needed, which reduces electricity consumption significantly. If you forget to turn off the lights, and let’s be honest, who hasn’t, the motion sensor handles it automatically with a built-in timer, typically 30 seconds to 5 minutes depending on the model. Over months and years, those savings add up, both on your utility bill and in reduced environmental impact.
Brightness and task lighting also benefit from sensor technology. Under cabinet lights target the countertop workspace precisely, eliminating shadows where knives meet cutting boards and making food prep safer and clearer. A motion sensor cabinet light rechargeable option gives you flexibility if you’re hesitant about hardwiring, perfect for rental kitchens or testing the concept before committing to permanent installation.
Types of Sensor-Equipped Under Cabinet Lighting Systems
Motion Sensor Lights
Motion sensor lights are the most straightforward sensor-activated option. They use passive infrared (PIR) technology to detect body heat and movement within their range, usually 6 to 10 feet depending on the model. When motion is detected, the lights turn on immediately: when no movement is sensed for a preset duration (typically 30 seconds to 5 minutes), they fade or shut off automatically.
These come in two main flavors: hardwired and rechargeable. A motion sensor cabinet light rechargeable model uses a built-in lithium battery and is ideal for renters or kitchens where running new electrical wire is impractical. You charge it via USB, and it typically runs for weeks between charges depending on usage frequency. Hardwired versions tap into your existing kitchen circuit and provide unlimited runtime without battery concerns, the better choice for permanent installations in owned homes.
Brightness and Occupancy Sensors
Some advanced motion activated under cabinet lighting fixtures include ambient light sensors alongside motion detection. These sensors measure existing natural or artificial light in the kitchen and adjust the under cabinet lights accordingly. If sunlight streams through your windows at noon, the lights stay dim or off entirely. Once evening falls or clouds roll in, they activate at full brightness automatically.
Occupancy sensors (a step up from basic motion detection) provide smarter scheduling. They don’t just respond to movement: they learn patterns. If you enter the kitchen daily at 6 a.m., the system can preemptively illuminate the countertop before you arrive. This hybrid approach combines convenience with efficiency and suits kitchens where manual control feels outdated.
Installation Guide for DIY Homeowners
Before you grab your tools, assess your kitchen layout. Under cabinet lights mount on the underside of wall cabinets, directly above your countertop work surface. Measure the length of each cabinet run, most DIYers install fixtures on one or two primary prep areas rather than wrapping the entire kitchen.
Tools and Materials You’ll Need:
- Measuring tape and pencil
- Level (2-foot minimum)
- Drill and drill bits (for pilot holes)
- Screwdriver (Phillips and flathead)
- Wire strippers and electrical tape (if hardwiring)
- The motion sensor under cabinet light kit itself
- Mounting brackets (often included)
- Cable clips or conduit (for hardwired versions)
- Safety glasses and work gloves
For Rechargeable Models:
- Locate a mounting position 4–6 inches back from the cabinet edge on the underside.
- Use the included template to mark screw holes: drill pilot holes to prevent splitting.
- Slide mounting brackets into place and secure with provided screws.
- Snap or screw the light unit onto the bracket, most rechargeable units use a simple friction or clip-based connection.
- Charge fully before first use and test the motion sensor range and timer settings.
Installation typically takes 15–30 minutes per fixture. No electrical expertise required, and no permits needed since you’re not modifying your home’s main electrical system.
For Hardwired Systems:
Hardwired under cabinet motion sensor cabinet lights require running electrical wire from your kitchen circuit to each fixture location. This is where things shift from simple to moderately involved. If you’re comfortable with basic household electrical work (running wires through existing conduit, making connections in a junction box), you can handle it. But, if you’ve never worked with home wiring, hire a licensed electrician. Many jurisdictions require permits and inspections for any new permanent lighting circuits, and codes vary by location.
Mount brackets identically to the rechargeable approach, but route wire carefully along the underside of cabinets using cable clips, keeping tension moderate to avoid stress on connections. Connect the fixture to your chosen power source, typically a kitchen circuit that handles countertop appliances. Follow the manufacturer’s wiring diagram precisely: incorrect connections create fire and shock hazards.
Step-by-step hardwired installation is beyond this article’s scope, consult Family Handyman’s under-cabinet lighting guide for detailed wiring instructions or defer to a pro.
Choosing the Right Sensor Lighting for Your Kitchen
Start by defining your priorities. Are you renting? A rechargeable motion sensor cabinet light is your fastest, least destructive option. Own your home and plan to stay put? Hardwired fixtures offer more stable power and eliminate battery management, just replace LEDs every 5–10 years if needed.
Brightness matters more than specs suggest. Check the lumens rating, not just wattage. Under cabinet lighting should deliver 300–500 lumens per linear foot of countertop for adequate task lighting. If your kitchen is naturally dark or your eyesight demands extra illumination, aim higher. Conversely, if your kitchen receives abundant natural light or you prefer softer ambient lighting, 200–300 lumens suffices.
Color temperature affects the feel of your workspace. Most task lighting runs 3,000K (warm white) to 5,000K (cool white). Warm white feels cozy and forgiving: cool white mimics daylight and reduces eye strain for detail work. Many sensor fixtures offer both, switchable via remote or app. The Kitchn’s kitchen design articles often explore how lighting shapes a kitchen’s character if you want deeper insight.
Motion sensor range varies widely, some activate from 3 feet away, others from 12 feet or more. For under cabinet use, 6–8 feet is ideal. Anything wider risks the lights triggering when you pass through the room without intent to work. Timer settings should be adjustable: 1–2 minutes works well for most kitchens, giving you time to grab an item without the lights cutting off mid-task.
Budget-conscious? Rechargeable units run $30–$100 per fixture: hardwired kits span $50–$300+ per fixture depending on length and smart features. Digital Trends’ review of under-cabinet lighting options benchmarks popular models across price tiers.
Maintenance and Troubleshooting Tips
Motion sensor under cabinet lights are low-maintenance, but a few common issues pop up. Dust buildup on the LED lens dims output without affecting the motion sensor’s detection. Wipe fixtures quarterly with a soft, dry cloth, avoid water around electrical connections on hardwired units.
Motion sensor won’t trigger? First, confirm the fixture has power (hardwired) or a charged battery (rechargeable). Then check the sensor’s position. Most PIR sensors have a 90–120-degree detection cone directly in front of them. If cabinets are mounted deep into your kitchen, the sensor may not “see” the countertop work area. Adjust the fixture’s angle or reinstall it further forward if possible. Obstructions like large appliances or hanging utensil racks can also block the sensor’s line of sight.
Lights triggering too frequently? The timer setting might be too long, or the sensor is overly sensitive. Most models have an adjustable sensitivity dial: dial it down slightly. If you frequently pass through the kitchen without intent to work there, repositioning the fixture toward your primary prep zone helps.
Flickering or dimming? On rechargeable units, the battery may need replacement after 2–3 years of daily use. Hardwired systems that flicker typically have a loose connection at the fixture or junction box, tighten screws and retest. If LED color shifts over time (looking yellower), the LEDs are aging: most fixtures support LED bulb replacement, though this is less common on integrated sensor units.
For persistent issues, unresponsive sensors, won’t hold charge, or electrical concerns, consult the manufacturer’s support line rather than troubleshooting further. Motion sensor cabinet lights are reliable, but they’re also relatively inexpensive to replace if a component fails. Investing a few dollars in a replacement unit beats hours of frustration troubleshooting an older fixture. When you’re ready to explore integrated solutions, our guide on installing under cabinet lighting covers additional setup considerations beyond sensor functionality.

