Outdoor lighting isn’t an afterthought, it’s the foundation of a functional and inviting backyard. When done right, a well-placed fixture transforms a dark corner into a gathering spot, adds security to entryways, and extends the usable hours of your outdoor space well past sunset. Designer outdoor lighting sits at the intersection of aesthetics and practicality: it illuminates your landscape, highlights architectural features, and sets the mood for everything from intimate dinners to weekend entertaining. Whether you’re upgrading tired porch lights or planning a complete outdoor lighting overhaul, understanding design styles, placement strategies, and installation basics will help you make choices that both look polished and perform reliably.
Table of Contents
ToggleKey Takeaways
- Designer outdoor lighting serves three critical functions—safety, functionality, and design—transforming dark backyards into inviting, usable extensions of your home.
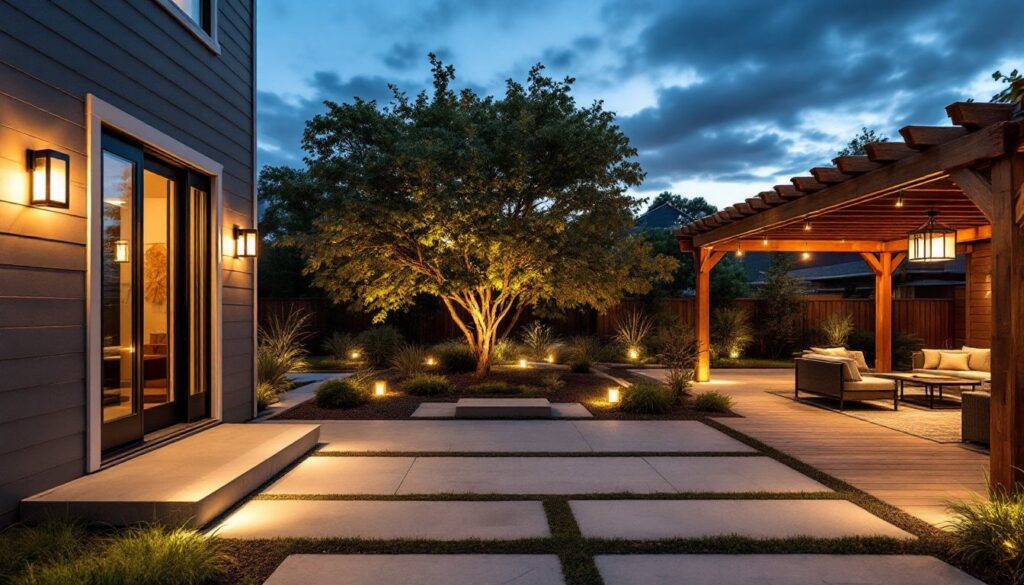
- Layering multiple light sources with warm color temperatures (2700K–3000K) prevents harsh, flat lighting and creates intimacy for evening gatherings.
- Modern minimalist and rustic farmhouse styles dominate designer outdoor lighting, with choices ranging from sleek brass and matte black fixtures to weathered wrought iron and Edison bulbs.
- Strategic placement in zones—entry lighting (50–100 foot-candles), ambient patio lighting (5–10 foot-candles), and accent fixtures—ensures both safety and visual appeal without one-size-fits-all solutions.
- Low-voltage systems offer a DIY-friendly alternative to hardwired installation, costing $300–$600 and typically requiring no permit, while hardwired work demands GFCI protection and often needs a licensed electrician.
- Starting with one outdoor lighting zone and letting that success inform your next phase reduces overwhelm and allows you to achieve both aesthetic polish and practical performance.
Why Outdoor Lighting Matters for Your Home
Good outdoor lighting serves three critical functions: safety, functionality, and design. Poorly lit entryways, steps, and pathways create tripping hazards and invite unwanted visitors. Adequate task lighting near a grill or seating area lets you actually use your outdoor space after dark. And thoughtfully designed fixtures, whether a statement piece above your entry or subtle accent lighting along a garden bed, elevate curb appeal and home value.
Beyond the practical side, outdoor lighting shapes how your home feels. A fixture that catches evening light looks different in morning glare: warm color temperature (2700K–3000K) creates intimacy, while cooler tones (4000K and above) feel more clinical. Layering different light sources, ambient overhead fixtures, task lighting, and accent lights, prevents the harsh, flat effect of a single bright light. Most homeowners underestimate how much their outdoor space will improve with deliberate lighting choices, especially when fixtures are selected to complement both architecture and landscape.
Popular Designer Outdoor Lighting Styles
Modern Minimalist and Contemporary Designs
Minimalist outdoor fixtures strip away ornament and focus on geometry, clean lines, and material honesty. Think slim brass rods, flush mounts in matte black, and geometric cage pendants. These work especially well on contemporary homes with flat facades and open sightlines. Fixtures are often integrated into architectural elements, a sleek sconce placed beside a front door frame, or a linear pendant running the length of a patio overhang.
Contemporary design borrows from minimalism but allows slightly more personality. You might see a fixture with both brass and frosted glass, or a sculptural shape that reads as art rather than pure utility. Many contemporary pieces use LED technology to keep profiles slim and heat output low. Modern outdoor wall lighting is particularly popular for this style, offering wall-mounted solutions that frame entryways without consuming floor space.
Rustic and Farmhouse Lighting
Rustic fixtures embrace weathering, natural materials, and a lived-in aesthetic. Look for wrought iron frames, seeded glass, and finishes that patina over time, bronze, copper, and aged brass all fit the bill. A farmhouse-style fixture might feature a metal cage around glass, lantern proportions, or Edison-style filament bulbs visible through the shade.
These designs draw from traditional American and European farm architecture and work beautifully on cottage-style homes, ranch properties, or anywhere you want warmth and character. Wooden Nickel Lighting options represent a blend of rustic charm with modern durability, offering pieces that look hand-forged but resist rust and fade. The key is that rustic fixtures often feel more generous in scale, a substantial lantern rather than a minimal pod. They pair well with exposed beams, board-and-batten siding, and natural stone landscaping.
Key Placement and Layout Strategies
Lighting placement follows function and flow. Start by mapping your outdoor activities: Where do people gather? Where do they move between spaces, from car to front door, from patio to garden? What views matter from inside looking out?
Entry and transition zones need bright, welcoming light. A fixture above or beside a front door should deliver 50–100 foot-candles at ground level (measure in lumens: plan roughly 10–20 lumens per square foot for safety). Placement 6–8 feet high is standard: going too low creates glare, too high and you lose definition.
Ambient lighting fills open areas like patios or seating zones. This is where outdoor ceiling lighting solutions shine, a fixture mounted to a pergola, soffit, or overhang casts even, overhead light without the harsh shadows of a single hanging pendant. Plan for 5–10 foot-candles here: you want to see faces and move safely, not floodlight the yard.
Accent and task lighting highlight specific features. A well-placed uplight under a specimen tree creates drama: a low-voltage fixture along a planting bed guides the eye and suggests landscape boundaries. Decorative lighting fixtures excel at accent work because they’re often the focal point themselves, a sculptural piece doesn’t just light a corner, it becomes a design statement. Reserve task lighting for grilling zones, seating areas, or any functional zone where shadow matters.
When planning layout, work in zones rather than attempting one blanket solution. A typical suburban lot might have entry lighting, a patio zone, a pathway to a back gate, and accent lighting around plantings, that’s four distinct systems, each with its own fixture type and brightness level.
Practical DIY Installation Tips
Before you buy fixtures or tools, confirm what’s involved. Hardwired fixtures (those connected to your home’s electrical system) require running wire through conduit, integrating with a circuit, and often a permit. Low-voltage systems (12V or 24V) run on a transformer and use thin, flexible wire, much simpler for DIY work. Battery-powered or solar options skip wiring entirely but trade runtime and brightness for ease.
For hardwired work outdoors, you’ll need GFCI protection (ground-fault circuit interrupter) on any outlet or circuit within 25 feet of water or grade. This is code in most jurisdictions and non-negotiable for safety. If you’re uncertain about running new circuits or retrofitting existing ones, call a licensed electrician. A rough estimate for hardwired installation might run $500–$2,000 depending on distance from your panel and conduit routing, plus permit and inspection fees.
For low-voltage systems, you can often DIY the entire job. A typical setup includes a 150W transformer (plugs into an outdoor GFCI outlet), low-voltage cable, and landscape fixtures with snap-on connectors. Run cable along the house foundation, under mulch, or tucked along hardscape edges. Bury it at least 6 inches if foot traffic crosses over it. Low-voltage kits from reputable manufacturers cost $300–$600 and rarely require a permit.
Material and prep checklist:
- Measure distances from power source to fixture locations before buying wire.
- Use marine-grade silicone caulk to seal any entry points where wire or conduit enters the house.
- Clean fixture mounting surfaces with a wire brush before installation: debris prevents good electrical contact.
- Check that mounting brackets are rated for your climate zone (freeze-thaw cycles corrode fasteners).
- Test all connections before powering on: a loose wire creates heat and fire risk.
Safety reminders: Always wear work gloves and safety glasses when handling conduit and fixtures. Turn off power at the breaker before touching any hardwired components. If digging, call 811 (or your local utility locating service) to mark underground lines. Never mix indoor and outdoor fixtures, outdoor fixtures must be rated for moisture and UV exposure. Lee Broom Lighting and other designer brands provide detailed installation guides: follow them exactly rather than improvising connections.
Conclusion
Designer outdoor lighting transforms a backyard from a dark liability into an extension of your living space. By choosing styles that match your home’s personality, placing fixtures thoughtfully, and installing them safely, you get both aesthetic polish and practical reward. Start with one zone, a patio or entryway, and let that success inform your next phase. Your outdoor space after dark will thank you.

