Black bathroom lighting has become a go-to choice for homeowners and designers looking to add sophistication and contrast to small spaces. Unlike traditional chrome or brushed nickel finishes, black fixtures create visual weight and drama while seamlessly blending into modern, transitional, and industrial bathroom designs. Whether you’re planning a full renovation or swapping out dated sconces, black bathroom lighting offers versatility, contemporary appeal, and surprisingly practical benefits for task lighting around mirrors and vanities. This guide walks you through selecting, installing, and layering black fixtures to maximize both style and function in your bathroom.
Table of Contents
ToggleKey Takeaways
- Black bathroom lighting creates visual contrast and sophistication while hiding water spots better than polished metals, making it ideal for hard water areas and long-term durability.
- Vanity lights should be positioned 18 to 24 inches above the countertop on either side of the mirror, following the one-third rule where fixture width matches roughly one-third of your mirror’s width.
- Effective bathroom lighting uses layering with ambient (ceiling lights), task (vanity sconces), and accent lighting on separate switches for flexible brightness control throughout your space.
- Black bathroom lighting fixtures with matte or satin finishes paired with LED bulbs rated CRI 90 or higher at 3000K–4000K color temperature provide accurate color rendering and flattering illumination for daily routines.
- Proper installation requires electrical permits for new circuits, safety verification with a voltage tester, moisture-resistant connectors rated IP54 or higher, and professional help for complex wiring to ensure code compliance.
Why Black Bathroom Lighting Is a Game-Changer
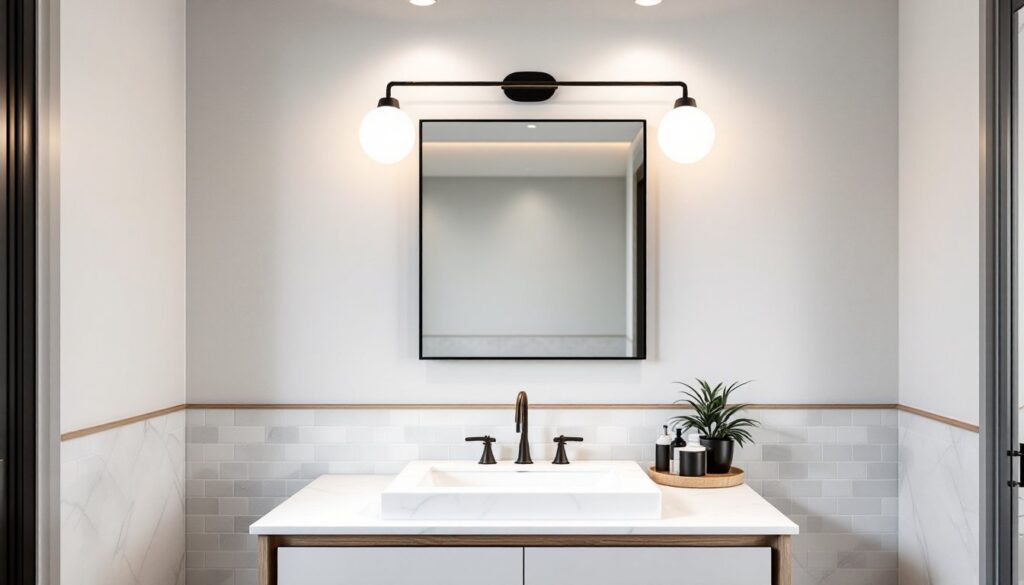
Black fixtures stand out because they create visual contrast without overwhelming a bathroom. In a room with white subway tiles or light gray walls, black vanity sconces or a matte black ceiling fixture anchors the space and draws the eye upward, a subtle design trick that makes bathrooms feel more intentional.
From a practical standpoint, black finishes hide water spots and mineral deposits far better than polished metals. If you live in an area with hard water, you’ll notice your chrome fixtures streaking within weeks: black matte or satin finishes stay cleaner-looking between cleaning cycles.
Black lighting also pairs exceptionally well with marble, brass accents, and natural wood trim. Many designers are using black fixtures as the connecting element between a vanity and mirror frame, creating a cohesive visual line that ties the whole space together. The finish works across budget levels too, from budget-friendly builder-grade fixtures to designer-quality pieces.
Another often-overlooked benefit: black fixtures tend to be less trendy than rose gold or polished brass, meaning they’ll feel current for years without looking dated. They’re a smart investment for resale value, especially in homes where neutral, sophisticated finishes appeal to broader buyer pools.
Types of Black Bathroom Lighting Fixtures to Consider
Vanity Lights and Wall Sconces
Vanity lighting is the workhorse of bathroom lighting, it’s where you apply makeup, groom, and get ready. Black vanity lights typically come in 1-light, 2-light, or 4-light configurations, mounted horizontally above or beside the mirror.
For most bathrooms, position vanity lights 18 to 24 inches above the countertop, mounted on either side of the mirror. This angle minimizes shadows on your face, which is why professional makeup mirrors use symmetrical side-mounted fixtures. A single center-mounted fixture above the mirror creates harsh shadows and isn’t recommended for task lighting.
Wall sconces in black matte or satin finishes work beautifully flanking a medicine cabinet or mirror. Look for fixtures with opaque or frosted shades rather than clear glass, they reduce glare and create softer, more flattering light. LED vanity fixtures with 3000K to 4000K color temperature (warm white to neutral white) are ideal: avoid anything cooler than 4000K as it can feel clinical and unflattering in a bathroom setting.
When sizing vanity lights, follow the one-third rule: the fixture width should be roughly one-third the width of your mirror. A 36-inch mirror pairs well with a 12-inch vanity light. This keeps proportions balanced and prevents the fixture from looking lost or oversized.
Ceiling Fixtures and Overhead Options
Ceiling-mounted black fixtures provide ambient lighting that fills the entire bathroom. Recessed downlights with black trim rings or trim bezels integrate seamlessly into a drop ceiling or drywall. If you’re installing new recessed lights, space them 4 to 6 feet apart for even coverage and aim for fixtures rated 600 to 800 lumens per light in most bathrooms (adjust based on room size and existing natural light).
Matte black or satin black finish on recessed trim looks contemporary and less hospital-like than chrome. Avoid glossy black as it reflects light back into the fixture and reduces efficiency.
For a statement look, a black semi-flush or flush-mount ceiling fixture works in smaller bathrooms or powder rooms. These fixtures mounted 8 to 10 inches from the ceiling provide soft ambient light and add visual interest overhead. Choose fixtures with frosted or ribbed glass diffusers rather than clear ones to soften the light and reduce glare.
Some homeowners combine recessed lights with a decorative black ceiling fixture, layering ambient and accent lighting. Just make sure they’re on separate switches so you can control brightness and mood independently.
Strategic Placement and Layering for Optimal Illumination
The best bathroom lighting uses layering, combining ambient (overall room), task (vanity and mirror), and accent lighting. A single fixture, no matter how nice, rarely provides enough functional light for morning routines.
Start with ambient lighting: recessed ceiling lights or a flush-mount fixture that covers the entire room evenly. This is your baseline, typically controlled by a standard wall switch. Add task lighting next: vanity sconces positioned to illuminate your face without shadows. Finally, consider accent lighting, perhaps a backlit mirror or small LED strip under the vanity edge, for spa-like atmosphere when needed.
For optimal color rendering, use LED bulbs rated CRI 90 or higher (color rendering index). This ensures makeup colors, skin tone, and tile colors look accurate under the light. You’ll notice the difference immediately when comparing CRI 80 to CRI 95.
If your bathroom has windows, position vanity lights to match natural daylight color temperature (around 4000K). This prevents the jarring shift when you leave the bathroom and encounter the actual outdoors, a common rookie mistake with overly warm or cool bathroom lighting.
For bathrooms larger than 50 square feet, consider installing a separate fixture for the toilet or shower area. Lighting the entire room with vanity lights alone leaves the back area dim and awkward. A black ceiling fixture centered over the toilet or a compact flush mount in the shower area (rated IP65 or IP66 for moisture resistance) ties everything together.
Dimmers add flexibility: use a trailing-edge dimmer compatible with your LED bulbs to adjust brightness from bright morning prep to soft evening wind-down. Not all LED bulbs dim well, so verify dimmer compatibility before purchasing.
Installation Tips for DIY Bathroom Lighting Projects
Before you start, confirm whether your project requires a permit. Adding or replacing a fixture with the same wiring usually doesn’t: moving circuits or running new wiring almost always does. Check your local building department, rules vary by jurisdiction, and unpermitted work can affect home resale and insurance.
Safety first: Turn off power at the breaker and verify it’s off with a non-contact voltage tester (about $10 at any hardware store). Don’t rely on a light switch alone. Wear safety glasses when working overhead: falling debris or water splashes are real hazards in bathrooms.
For vanity light replacement, most fixtures mount to a bar bracket secured between two studs in the wall. If your old fixture used the same mounting points, installation is straightforward: disconnect the old wiring (typically a black live wire, white neutral, and bare copper or green ground), install the new bar bracket at the same height, and connect the new fixture’s wires using wire nuts (twist-on connectors rated for the wire gauge you’re joining).
When installing recessed lights in a drop ceiling or existing drywall, you’ll need remodel cans (also called retrofit housings), these clamp to the ceiling material without requiring framing behind them. Mark light positions on the ceiling, use a drywall saw or hole saw to cut openings (typically 4 to 5 inches depending on fixture size), and slide the housing up into the opening, then secure the clamps. Run electrical wire from your existing circuit (if permitted) or hire a licensed electrician to run new circuits.
For moisture-prone areas like around showers or above tubs, use fixtures rated IP54 or higher for splash resistance. Black matte finishes may show fingerprints more readily than satin, so plan on occasional cleaning with a microfiber cloth.
Wire connections must be weathertight in bathrooms due to humidity. Use silicone-filled wire nuts or other moisture-resistant connectors, and consider running wire through conduit if it’s exposed. If you’re not confident soldering or twisting wire connections, hire a licensed electrician, bathroom electrical work isn’t the place to experiment.
Conclusion
Black bathroom lighting transforms a utilitarian space into a stylish, functional room that works as hard as it looks good. The key is choosing the right fixture types, placing them strategically, and ensuring proper brightness for daily tasks. Whether you’re installing vanity sconces, recessed ceiling lights, or a statement flush mount, black finishes provide the contrast and sophistication modern bathrooms deserve. Start by assessing your current layout, measure twice, and don’t skip the safety steps, proper lighting makes all the difference between a bathroom that frustrates and one that inspires.

