Low voltage LED landscape lighting transforms your outdoor space with energy efficiency, safety, and design flexibility that high-voltage systems can’t match. Unlike traditional 120-volt lighting, low voltage systems run on just 12 or 24 volts, making them safer to install and maintain while using a fraction of the electricity. Homeowners and DIYers are increasingly choosing LED landscape lighting low voltage setups because they’re affordable upfront, require no permits in most jurisdictions, and deliver professional-looking results without hiring an electrician. Whether you’re lighting a pathway, highlighting garden beds, or creating ambient deck lighting, a well-designed low voltage system gives you complete control over your outdoor aesthetics while keeping energy bills low.
Table of Contents
ToggleKey Takeaways
- Low voltage LED landscape lighting systems operate safely at 12 or 24 volts, eliminating the need for electricians or permits in most jurisdictions while consuming 80–90% less power than traditional incandescent or halogen alternatives.
- Quality low voltage LED fixtures last 25,000–50,000 hours (10–15 years of nightly use), significantly reducing replacement frequency and maintenance costs compared to conventional outdoor lighting.
- Proper transformer sizing is critical: calculate total fixture wattage, add 20% for efficiency loss, then select a transformer 10–20% larger to prevent dim lights and voltage drop issues.
- LED landscape lighting low voltage systems offer complete design flexibility, allowing homeowners to add, relocate, or adjust fixtures seasonally without rewiring or additional construction permits.
- Common installation errors—undersized transformers, shallow cable burial, household extension cords, and over-tightened connectors—can be prevented by following proper sequencing and testing each fixture during setup.
- Annual maintenance including cable inspection, connector corrosion checks, and lens cleaning keeps your low voltage LED system operating at peak efficiency and prevents costly failures.
Why Low Voltage LED Landscape Lighting Is the Smart Choice for Homeowners
Understanding Low Voltage Systems and Their Key Benefits
Low voltage landscape lighting operates at 12V or 24V, stepped down from standard household current via a transformer. This lower voltage eliminates the shock hazard of 120V systems, meaning you don’t need a licensed electrician or a permit to install outdoor lighting in most jurisdictions, though always check local codes first. The safety advantage alone makes DIY installation feasible for anyone with basic tools.
Energy consumption is another major win. LED fixtures at low voltage use 80–90% less power than incandescent or halogen equivalents, translating to noticeably lower utility bills over months and years. A typical low voltage system running 20–30 fixture-hours per day might add $5–10 monthly to your electric bill, compared to $30–50 for traditional landscape lighting.
LED longevity seals the deal. Most quality low voltage LEDs last 25,000–50,000 hours before dimming, roughly 10–15 years of nightly use. You’ll replace bulbs far less often and spend less on maintenance. The system also allows precise control through dimmers and timers, so you’re not wasting electricity illuminating your landscape when nobody’s looking at it.
Installation flexibility means you can add or relocate fixtures without rewiring. Simply stake the cable where you want it, and adjust lighting zones seasonally. That flexibility is a game-changer for renters or homeowners who like to refresh their outdoor design.
Essential Components of a Low Voltage LED Landscape System
A complete low voltage LED system has four core pieces: a transformer, a control timer, low voltage cable, and fixture heads.
The transformer is the system’s heart. It steps household voltage down to 12V or 24V. Choose a transformer rated for the total wattage of all your fixtures: undersizing causes dim lights and overheating, while oversizing wastes energy. Most residential setups use a 600–1000W transformer, which powers 20–40 landscape lights depending on fixture wattage. Look for models with a photocell (light sensor) and built-in timer: they automatically turn your system on at dusk and off at dawn.
Low voltage cable is typically 12- or 10-gauge copper, UV-resistant, and buried just 6–8 inches below grade or staked across mulch beds. Don’t skimp on gauge: thinner wire causes voltage drop over distance, dimming lights far from the transformer. Most 12V systems recommend 10-gauge for runs longer than 100 feet.
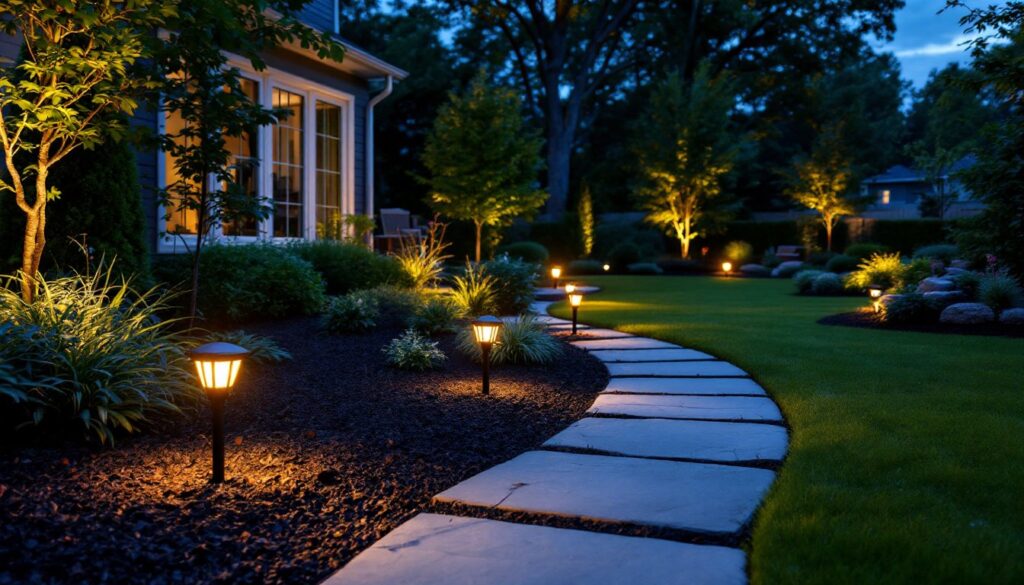
LED fixtures come in dozens of styles: spotlights, path lights, well lights, and in-ground uplights. Wattage per fixture typically ranges from 3–8W for accent lighting to 12–20W for broad illumination. Low voltage LEDs come in warm (2700K) and cool (4000K+) color temperatures: warm tones suit residential landscapes, while cool tones work better for security or architectural accent lighting.
Wire connectors and a weatherproof junction box complete the setup. Avoid twisting wires together outdoors: use proper low voltage connectors designed to shed water. Hlb Lighting: Shedding Light on the Future of Illumination explores advanced lighting innovations that inform modern landscape design choices.
Planning Your LED Landscape Lighting Layout and Design
Before buying fixtures, sketch your landscape and identify focal points. What do you want to highlight, foundation plantings, a deck, a water feature, or pathways? Mark those zones on paper.
Next, determine the light spread and spacing. Path lights typically space 8–10 feet apart and cast light 6–8 feet to either side. Accent uplights need tighter spacing, 5–6 feet, to avoid dark gaps. A rough rule: aim for 2–3 foot-candles of light on walkways (enough to navigate safely) and 5–10 foot-candles for accent and feature lighting.
Calculate total wattage. Add up all fixture wattages, add 20% for transformer efficiency loss, then choose a transformer 10–20% larger. For example, 30 lights at 5W each = 150W: add 20% = 180W: choose a 250W transformer to leave headroom.
Consider cable runs and transformer placement. The transformer should live in a garage, under an eave, or in a weatherproof box near an outdoor outlet. Cable runs longer than 75–100 feet at 12V risk noticeable dimming: use 24V systems or boost with a second transformer for distant zones. Plan pathways and hide cable behind mulch or under edging where visible.
Think about glare and spillover. Aim lights downward or at angles: direct light pointed at eye level from your patio creates harsh glare and is uncomfortable. Shield uplights to prevent light spilling into neighbors’ yards, a thoughtful approach to outdoor lighting.
Installation Tips for DIY Landscape Lighting Projects
Installation is straightforward if you prep properly. Wear gloves and safety glasses when handling sharp cable ends and digging. Here’s the sequence:
1. Lay out the cable run. Unroll your low voltage cable and stake it loosely along planned routes. Walk the layout and adjust for aesthetics and safety (keep it clear of traffic and mulch disturbance).
2. Bury or hide the cable. For permanent installations, dig a 6–8 inch trench and lay cable in the bottom, then backfill. Outdoor-rated cable doesn’t need conduit but can go in PVC for extra protection in high-traffic areas. Above-ground cable can be secured with landscape staples or laid under mulch if you plan to move lights later.
3. Connect the transformer. Mount it near your outlet (a GFCI-protected outlet is safest). Turn off power, then connect the transformer’s output wires to your cable using proper low voltage connectors, crimp or screw terminals rated for outdoor use. Seal connections with silicone caulk if exposed.
4. Attach fixture wires. Strip ¼ inch of insulation from each fixture lead, insert into the connector, and tighten. Test each fixture at low brightness before final placement: a non-functional light often means a loose connection.
5. Position and stake fixtures. Place lights where they align with your design. Solar Street Lighting: The Future of Eco-Friendly Urban Illumination discusses hybrid approaches that blend solar and line-power systems for versatile outdoor installations.
6. Test and adjust brightness. Power on and observe light spread. Some transformers have adjustable output or dimmers: use these to dial in brightness and reduce glare.
Common missteps: undersizing the transformer, using household extension cords instead of low voltage cable, burying cable too shallow (where mowers and foot traffic can damage it), and over-tightening connector screws (which crushes wires). Work methodically and test as you go.
Maintenance and Troubleshooting Your Outdoor LED System
Low voltage LED systems are low-maintenance, but a few annual checks keep them running smoothly. Once per year, ideally in spring, inspect cable for cuts or damage, especially where it crosses walking paths. Check connections for corrosion: apply a thin coat of dielectric grease to terminals if you see white or green oxidation.
LED fixtures rarely burn out, but lenses can collect dirt and debris. Wipe fixtures with a damp cloth in fall to remove leaves and dust: clean lenses improve light output by 10–15%. Adjust fixture angles if soil settling tilts them out of position.
Troubleshooting common issues:
If lights won’t turn on, first verify the transformer is receiving power, check the outlet and flip any GFCI breaker if needed. Next, inspect connector terminals for corrosion or loose wires. Tighten set screws gently and retest.
Dim lights usually mean voltage drop or an undersized transformer. If only distant lights dim, upgrading to a heavier gauge cable or adding a second transformer for that zone fixes it. If all lights dim equally, the transformer may be overloaded: disconnect a few fixtures and retest.
Flickering lights suggest loose connections or water in a terminal. Dry and reseal the connector with waterproof grease or caulk, then retest. Recent advances in smart home technology enable automated low voltage systems that monitor performance and alert you to faults.
Most failures are preventable with thoughtful installation and annual inspection. Keep a simple log: transformer size, cable gauge, number and wattage of fixtures, and any adjustments. This record helps troubleshoot future issues and informs upgrades.
Conclusion
LED landscape lighting low voltage systems deliver professional outdoor illumination with minimal electrical know-how and budget. You control safety, energy use, and design flexibility, all hallmarks of smart DIY. Start small with a single transformer and a few pathway or accent lights, test the design, then expand seasonally. With proper planning and straightforward installation, your landscape will shine year-round while your energy bills drop.

