Applying makeup in dim, yellowy bathroom light is a recipe for disappointment. You spend time getting your foundation blended, only to step into natural light and realize it’s uneven. The problem isn’t your makeup skills, it’s the lighting. Proper bathroom makeup lighting transforms how you look and feel in the space, making application faster and the results more reliable. Whether you’re renovating a bathroom or just upgrading an outdated fixture, understanding color temperature, brightness levels, and placement strategies makes the difference between guesswork and confidence.
Table of Contents
ToggleKey Takeaways
- Proper bathroom makeup lighting at 4000K–5000K (neutral to cool-white) with a CRI of 90+ reveals true skin tones and colors, eliminating mismatched foundation and uneven blending that often appear in daylight.
- Side or front-facing light positioned at eye level (typically 48–60 inches from the floor) eliminates harsh shadows under cheekbones and eyes, delivering the most accurate makeup application results.
- LED fixtures are the best lighting option for bathroom makeup because they’re energy-efficient, long-lasting, and available in any color temperature—pair them with dimmers to adjust brightness for different times of day.
- A combined setup of 1200–1500 lumens total brightness with vanity lights, sconces, or LED strips creates task-specific illumination without glare, allowing you to apply makeup with confidence rather than guesswork.
- Avoid overhead-only lighting and warm-toned bulbs below 3000K, as they cast unflattering shadows and wash out cool-toned makeup, setting you up for visible mistakes throughout the day.
Why Proper Bathroom Lighting Matters for Makeup Application
Bad bathroom lighting doesn’t just make makeup application harder, it sets you up for visible mistakes throughout the day. Harsh shadows under cheekbones, mismatched foundation, and uneven eyeshadow blending are all symptoms of inadequate or poorly positioned light. When light comes from the wrong angle or lacks sufficient brightness, you compensate by applying more product than necessary or adjusting your technique in ways that don’t translate to daylight.
Correct lighting reveals skin tone accurately, shows true colors, and eliminates the guesswork. A well-lit bathroom mirror becomes a tool that works for you instead of against you. Beyond makeup, proper lighting also improves safety, you can see what you’re doing, reducing the risk of nicks from razors or mishaps with hot styling tools.
The ideal bathroom lighting setup combines ambient brightness with task-specific illumination directly at the mirror. Think of it like a professional makeup artist’s station: they use bright, well-positioned lights around the mirror so every angle of the face is visible without shadows.
Color Temperature and Light Quality: Finding the Right Balance
Color temperature, measured in Kelvin (K), determines whether light feels warm or cool. This matters more than most people realize because it affects how makeup colors appear. Warm light (2700K–3000K) feels cozy but can wash out cool-toned makeup and create a yellowish cast. Cool light (4000K–5000K) is closer to natural daylight and reveals makeup colors more truthfully.
For makeup application, aim for 4000K to 5000K (neutral to cool-white). This range mimics natural daylight without the harshness. Avoid anything below 3000K for primary mirror lighting, it’s too warm and defeats the purpose. But, some people prefer 5000K to 6500K (daylight) if they’ll wear makeup primarily outdoors or in office settings with bright overhead lighting.
Light quality matters as much as temperature. Look for a Color Rendering Index (CRI) of 90 or higher. CRI measures how accurately colors appear under a light source (with 100 being perfect daylight). Cheap fluorescents or dim LEDs with poor CRI will give you false color representation, leading to makeup that looks wrong once you leave home.
Natural Light vs. Artificial Lighting Options
Natural light is the gold standard for makeup application, but it’s not reliable in bathrooms. Windows are often small or frosted for privacy, and daylight changes throughout the day and year. If your bathroom has a window near the mirror, take advantage of it during morning hours when light is brightest and most neutral. But don’t depend on it alone, you need consistent artificial backup.
Artificial options break into three categories. Incandescent and halogen bulbs (warm, 2700K–3000K) are largely outdated and inefficient. Fluorescent lights are cheap and bright but often have poor CRI and can flicker. LEDs dominate today’s market because they’re energy-efficient, long-lasting, run cool, and available in any color temperature. For bathroom makeup lighting, LED is your best choice. Pair them with dimmers so you can adjust brightness for different times of day or tasks. Some premium LEDs are also tunable, letting you shift color temperature to match different environments where you’ll wear the makeup.
Mirror Lighting Solutions and Placement Strategies
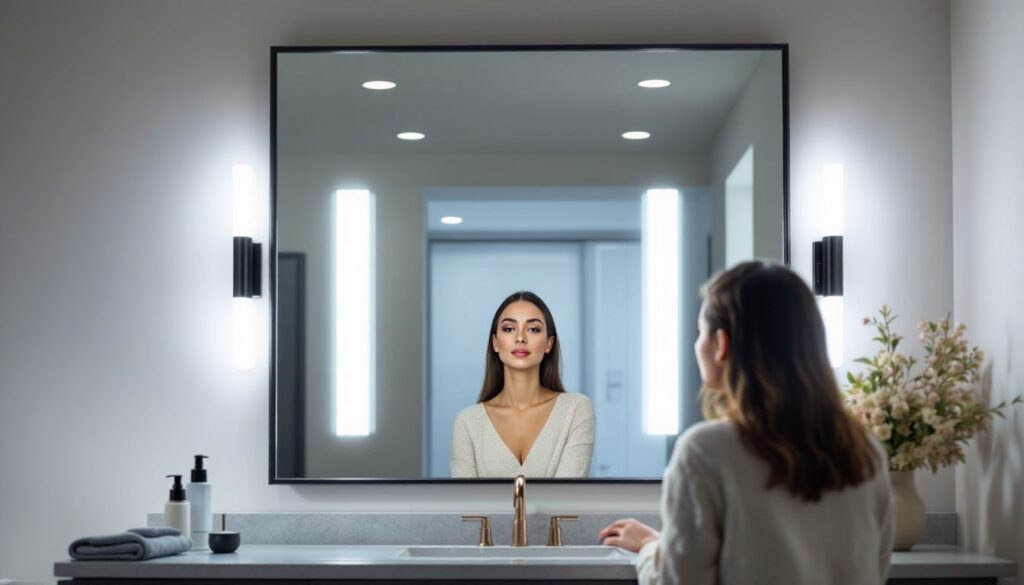
Where you place lights matters as much as which lights you choose. Overhead-only lighting casts shadows under the eyes and cheekbones, flattering to no one. Side or front lighting eliminates these shadows and shows your true face. The best bathroom makeup setups use a combination of ambient light and task lighting positioned around the mirror.
Vertical placement is critical. Lights should be at or slightly above eye level, positioned to either side of the mirror. This creates even illumination across the face without harsh shadows. If lights are too high, you get shadows under the eyes and cheekbones. Too low, and you get unflattering shadows above the cheekbones. Aim for fixtures roughly 12 to 18 inches from the mirror and at a height where the light beam hits your face head-on.
Research from design and lighting experts emphasizes this principle: vertical lighting placement dramatically improves makeup application accuracy. A mirror with lights on both sides creates balanced, shadowless illumination. Single-side lighting works if you only light one side, but dual-sided fixtures are the standard for a reason.
Vanity Lights, Sconces, and LED Strip Installations
Vanity lights (wall-mounted fixtures flanking the mirror) are the most common solution. They come in lengths from 24 inches to 36+ inches to match mirror width. Look for units with 4 to 8 bulbs spaced evenly across the fixture. Each bulb should produce 60 to 100 watts equivalent (LED) for sufficient brightness without being blinding. Install them at eye level, typically 48 to 60 inches from the floor for most adults.
Sconces are individual wall lights, usually mounted one on each side of the mirror. They’re aesthetically flexible and work well in bathrooms with limited wall space. To match vanity light brightness, you’ll need two sconces with bulbs rated 60 to 75 watts equivalent (LED) each. Sconces positioned 12 inches from the mirror edges and 60 inches high provide solid makeup lighting.
LED strip lighting is gaining popularity, especially in modern bathrooms. Flexible LED strips adhere to the frame or wall around the mirror, providing even, flicker-free illumination. Strips rated 2000 to 3000 lumens total output and 4000K to 5000K work well. The advantage is seamless light with no visible bulbs or dark spots. Installation is straightforward, clean the surface, peel off the backing, and press the strip in place. Many strips include dimmer switches via remote or phone app. Ensure the strips you choose are rated for bathroom use (moisture-resistant or waterproof), as humidity degrades cheaper electronics quickly.
For any of these options, supplementary overhead lighting helps with overall bathroom visibility. A recessed ceiling fixture or center-mounted light should provide ambient brightness without casting shadows on the mirror area. Some homeowners layer lighting with recessed lighting for ambient brightness and vanity lights for task work.
Brightness Levels and Lumens: What You Actually Need
Lumens measure light output. For bathroom makeup lighting, you need enough brightness to see detail without creating glare. The sweet spot is 1200 to 1500 lumens for a vanity light setup (both fixtures combined). That translates to roughly 150 to 200 lumens per bulb if you have a 6 or 8-bulb fixture with standard spacing.
If you’re installing sconces, aim for 600 to 750 lumens per sconce (300–375 per bulb if it’s a two-bulb sconce). LED strips should provide 2000 to 3000 lumens total across the mirror frame. These numbers assume your fixture uses white LED bulbs (not warm color-shifted varieties), as those deliver more apparent brightness.
Test before you commit. When shopping, hold a sample bulb or fixture near your face in the store under the same lighting conditions if possible. If that’s not practical, buy dimmable fixtures so you can adjust brightness to your preference once installed. Too bright feels harsh and creates glare: too dim defeats the purpose. Most people discover their ideal brightness is somewhere between “I can see every pore” and “this feels natural.”
For context, typical household lighting runs 400 to 800 lumens per 60-watt equivalent LED bulb. Makeup lighting is brighter because it’s task-specific and positioned closer to your face. Related guides on kitchen sink lighting share this principle, task areas need more lumens than general ambient lighting in the same room.
Conclusion
Bathroom makeup lighting isn’t complicated, but it’s easy to get wrong if you prioritize aesthetics over function. Focus on color temperature (4000K–5000K), CRI (90+), placement (side or front at eye level), and brightness (1200–1500 lumens total). Start with dimmable LED fixtures so you can adjust as you learn what works best. Your mirror should reveal your true face, not flatter it into a false sense of security. With the right setup, you’ll save time on application, reduce makeup waste, and feel confident about how you look all day.

