When it comes to landscape lighting, one of the first decisions you’ll face is voltage, and it’s more important than you might think. The voltage you choose determines everything from installation complexity and safety to energy consumption and cost. Most residential landscape lighting falls into one of three categories: low-voltage (12V), line-voltage (120V), or solar-powered systems. Each has distinct advantages and trade-offs. Understanding landscape lighting voltage basics helps you select the right system for your yard’s size, layout, and aesthetic goals. This guide walks you through the differences, so you can make an informed choice without hiring an electrician for a consultation.
Table of Contents
ToggleKey Takeaways
- Landscape lighting voltage determines installation complexity, safety, and energy costs—choose between low-voltage (12V), line-voltage (120V), or solar-powered systems based on your yard size and brightness needs.
- Low-voltage systems are the standard residential choice, affordable ($50–$300 transformers), DIY-friendly, and ideal for accent lighting on small to medium properties, though they require careful transformer placement to prevent voltage drop.
- Line-voltage landscape lighting delivers 2–5 times more brightness than low-voltage alternatives but requires permits, GFCI protection, professional installation, and costs $800–$2,500+, making it best for large yards or commercial properties.
- Wire gauge and transformer placement are critical in low-voltage design—use 10 AWG wire for 50-foot runs and 12 AWG for 30-foot runs to minimize voltage loss and fixture dimming.
- Solar lights offer convenient, permit-free accent lighting for renters and small spaces, but produce only 50–200 lumens with 2–3 year battery lifespan, making them better for testing layouts than permanent installations.
- Before any installation, call 811 to mark utility lines, verify local building codes for burial depths and permits, and always invest in landscape-rated cable, weatherproof connections, and annual maintenance to ensure safety and performance.
Understanding Landscape Lighting Voltage Basics
Voltage is the electrical force that pushes current through a circuit, think of it like water pressure in a hose. Higher voltage travels farther with less energy loss and can power brighter or multiple fixtures from a single line. Lower voltage is safer for homeowners to install and work with, but it requires thicker wire and closer transformer placement to avoid voltage drop.
In residential landscape work, you’ll encounter two main voltages: 12-volt (low-voltage) and 120-volt (line-voltage). Low-voltage systems use a transformer to step down standard household current (120V) to 12V. Line-voltage systems operate at the same voltage as your outlets and require proper conduit, grounding, and often a permit. Solar systems sidestep voltage entirely by converting sunlight into stored DC power.
Voltage drop matters more than you might expect. As current travels through wire, resistance causes voltage to decrease. A 12V transformer feeding lights 50 feet away might deliver only 11V at the fixture, enough to dim performance or flicker. This is why transformer size and wire gauge are critical in low-voltage design.
Low-Voltage Landscape Lighting: The Standard Choice
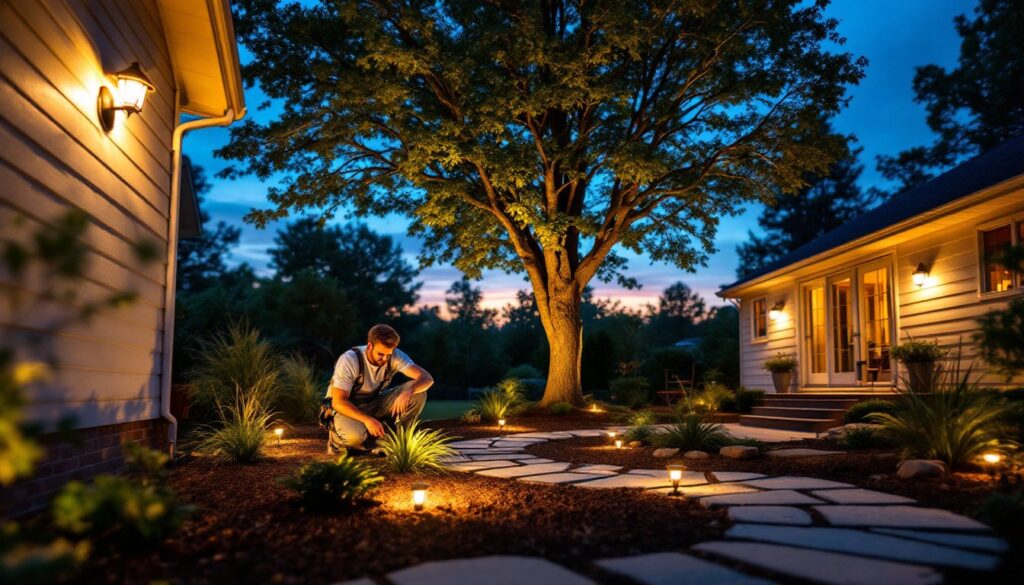
Low-voltage landscape lighting dominates residential yards for good reason: it’s relatively safe to install yourself, uses small gauge wire (typically 10 to 12 AWG), and transformers are affordable ($50–$300). Most homeowners can splice connections, bury cable without conduit, and adjust layouts without worrying about code violations, though local requirements always vary.
A 12-volt landscape lighting system starts with a transformer that plugs into a standard outlet or hardwires into a circuit. The transformer reduces voltage from 120V to 12V, then distributes power through landscape-rated cable to fixtures: spotlights, path lights, deck lights, or under-rail accents. Fixtures typically draw 10–20 watts each, so a 300-watt transformer can power 15–30 lights depending on wattage per fixture.
Budget $3–$8 per foot for quality wire and $40–$150 per fixture. Installation takes a weekend for most yards. The downside: 12V lights produce less lumens than line-voltage equivalents, so you may need more fixtures to achieve the same brightness. Also, transformer placement matters, too far from lights and you’ll experience noticeable dimming. Comprehensive guides on low-voltage landscape lighting cover transformer sizing and wire gauge selection in detail.
Low-voltage is ideal for accent lighting (uplighting trees, spotlighting features, path definition) and medium-sized residential properties (up to 1 acre).
Line-Voltage Systems: When You Need More Power
Line-voltage landscape lighting operates at 120V (standard household voltage) and delivers significantly more brightness than low-voltage alternatives. A single line-voltage fixture can produce 600–1000+ lumens: a low-voltage equivalent might deliver 150–300 lumens. If you need to illuminate a large patio, illuminate a driveway, or light an expansive backyard, line-voltage is worth considering.
The trade-off: line-voltage requires more planning and, in most jurisdictions, a permit. Outdoor circuits must include a GFCI breaker (ground fault circuit interrupter) for shock protection. Wiring runs through PVC conduit buried at least 18 inches deep (check local codes, some require 24 inches). Fixtures must be rated for outdoor use and properly grounded. Installation typically costs $800–$2,500+ depending on circuit runs and fixture count.
Line-voltage makes sense for large yards (1+ acres), commercial properties, or where maximum brightness is non-negotiable. It’s not a DIY project unless you’re experienced with electrical work and permitting. Hire a licensed electrician, the labor cost is worth the safety and compliance. Resources like family handyman and today’s homeowner offer guidance on when to call a pro.
Solar-Powered Options: Voltage-Free Convenience
Solar landscape lights eliminate the need for wiring, transformers, and electrical circuits entirely. Each fixture contains an integrated solar panel, rechargeable lithium or NiMH battery, and LED. During the day, the panel charges the battery: at dusk, a light sensor triggers the LED to illuminate for 6–10 hours.
Solar fixtures cost $20–$80 per unit and require zero installation, just push the stake into the ground or mount on a post. No permits, no transformers, no digging trenches. They’re perfect for renters, temporary lighting, or adding accent lights to a small patio. Performance varies by climate and sun exposure: in shady yards or overcast regions, solar lights underperform.
The trade-off: solar lights produce 50–200 lumens (much dimmer than hardwired options), battery lifespan is 2–3 years, and upfront cost per light is higher. They excel for path marking, garden ambiance, and spot accents, but don’t expect them to light a driveway or seating area reliably.
Solar is a practical first step if you’re unsure about landscape lighting or testing fixture placement before committing to a hardwired system.
Selecting the Right Voltage for Your Yard Layout
Start by assessing your yard’s size, sun exposure, and lighting goals. Ask yourself: Are you lighting a walkway, highlighting hardscape features, illuminating activity areas, or creating ambiance?
For small yards (under 1,000 sq ft) or accent lighting, low-voltage is the go-to. It’s affordable, safe, and adequate for uplighting trees, edging pathways, or accentuating deck railings. Transformer placement near the house (within 50 feet of fixtures) keeps voltage drop minimal.
For large properties or high-brightness needs, line-voltage suits you, but hire a licensed electrician. Permit costs are usually $50–$150 and protect your investment.
For testing or renting, or if your yard is heavily shaded, solar lights buy you flexibility. Place them, evaluate the effect, and decide on a permanent system later. Many homeowners start with solar, then upgrade to low-voltage once they’ve figured out what they want.
Wire gauge also factors in. A 12V system using 10 AWG wire can safely run 50 feet: 12 AWG drops to 30 feet before voltage loss becomes noticeable. If your yard is large or fixtures are spread far apart, you may need multiple transformers (one every 50 feet) or thicker, more expensive wire. Plan your layout on paper, measure distances, and calculate total wattage before buying materials. Hlb Lighting: Shedding Light discusses contemporary lighting trends that apply to landscape design.
Installation Safety and Maintenance Tips
Before you dig or turn on power, know your local building codes. Voltage requirements, burial depths, permit thresholds, and GFCI requirements vary by jurisdiction. Call your building department or check online, a 10-minute call beats a citation.
For low-voltage installation:
- Use landscape-rated cable (NOT indoor extension cord, it degrades outdoors).
- Bury cable 6–12 inches deep or use cable protectors if shallower.
- Avoid running cable under driveways or areas subject to compaction.
- Splice connections in weatherproof junction boxes: don’t leave bare crimps exposed.
- Wear work gloves when handling sharp cable connectors and digging.
For line-voltage work:
- Hire a licensed electrician. This isn’t a skill-building project: it’s code-compliance and safety.
- Ensure the circuit includes a GFCI breaker and proper grounding.
- Bury conduit at code-required depth (typically 18–24 inches).
General maintenance:
- Inspect fixtures annually for cracks, corrosion, or loose connections.
- Clear vegetation around fixtures so light isn’t blocked.
- Check transformers for audible buzzing (a sign of aging capacitors) and replace if necessary.
- Test solar lights’ battery capacity each spring: replace batteries if runtime drops below 4 hours.
- Clean fixture lenses with a soft cloth to maintain brightness.
Safety reminders: Always assume buried lines (gas, water, electric) exist. Call 811 before digging, it’s free and marks utility lines. Wear eye protection when trimming near lighting cable, and never work on line-voltage fixtures without turning off the breaker.
Conclusion
Choosing landscape lighting voltage comes down to yard size, brightness needs, and willingness to permit or DIY. Low-voltage systems suit most homeowners and yards: they’re affordable, safe, and effective for accent lighting. Line-voltage is for those who need serious brightness and have the budget for professional installation. Solar lights work great for small spaces or testing layouts. Whatever you choose, plan carefully, invest in quality fixtures and wire, and don’t skip safety steps. Your yard’s ambiance, and safety, depends on getting voltage right from the start.

