Recessed lighting transforms a room in ways flush-mount fixtures simply can’t match, it opens up the ceiling, creates a sleek aesthetic, and lets you control light direction with precision. Whether you’re brightening a kitchen, adding ambiance to a living room, or upgrading a dated bathroom, Home Depot’s recessed lighting selection gives you solid options across price points. But picking the right fixtures, measuring your layout, and handling the install correctly is where most DIYers stumble. This guide walks you through everything from understanding fixture types and selecting what fits your space to laying out a plan and getting the job done safely. By the end, you’ll know exactly what you’re buying and how to install it.
Table of Contents
ToggleKey Takeaways
- Home Depot recessed lighting comes in three main types—standard can lights, retrofit fixtures for existing holes, and adjustable trims—each suited to different installation scenarios and room layouts.
- Proper spacing of 4 to 6 feet apart and measuring your ceiling cavity depth (6–8 inches minimum) are critical before buying, as skipping this step leads to poor light distribution or fixtures that don’t fit.
- LED bulbs are the best choice for recessed lighting due to their 25,000+ hour lifespan, cool operation, and long-term energy savings despite higher upfront costs of $15–$40 per fixture.
- Color temperature selection matters: 2700K creates warm ambiance for living spaces, 4000K provides neutral light for kitchens and offices, and 5000K+ suits detailed task work.
- Always obtain electrical permits, shut off power at the breaker, and test wires with a voltage tester before installation; call a licensed electrician for new circuits or load-bearing ceiling modifications to ensure safety and compliance.
- Room-specific design tips—such as pairing overhead recessed lights with under-cabinet LEDs in kitchens and flanking bathroom mirrors with 4-inch cans—maximize functionality and eliminate shadows where they matter most.
Understanding Recessed Lighting Types at Home Depot
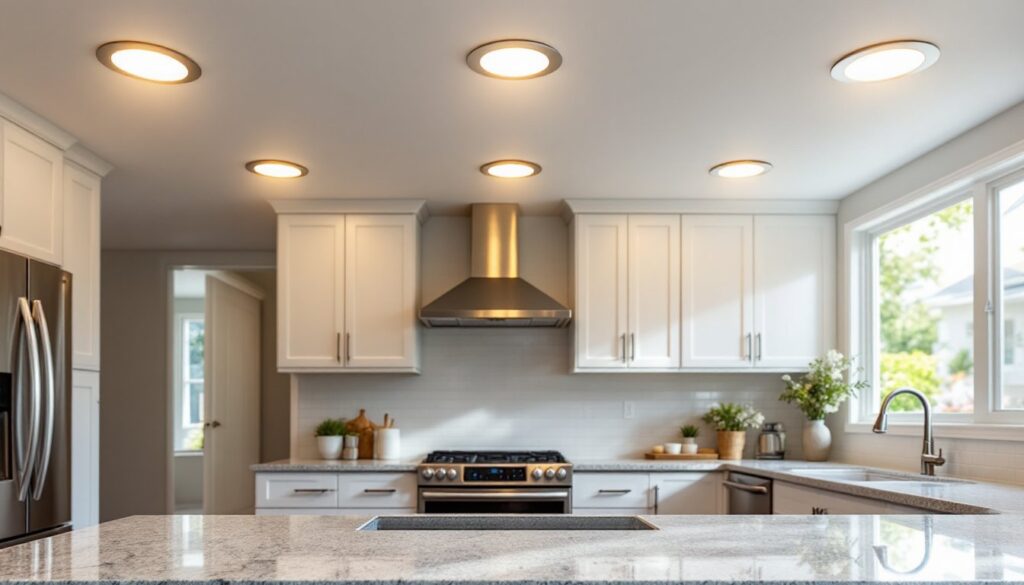
Home Depot stocks three main recessed lighting types: standard can lights (also called downlights), retrofit fixtures for existing holes, and adjustable trims. Can lights are the workhorse, they sit inside your ceiling cavity, with only the trim ring visible below. They come in 4-inch, 5-inch, and 6-inch diameters (measured across the trim). Smaller cans work for ambient light in tight spaces: 6-inch fixtures throw more light and suit larger rooms.
Retrofit fixtures (or “remodel cans”) are built for homes where you can’t run rough-in wiring behind walls easily, or for retrofitting into existing drywall. They grip the drywall from inside the hole with spring clips, so installation is faster but light output is often slightly less than standard cans.
Adjustable trims let you angle the bulb and trim ring, useful for accent lighting or task lighting. Fixed trims aim straight down, which is ideal for general illumination. Most Home Depot cans accept IC-rated (insulation contact) or non-IC housings: if your insulation will touch the can, you must buy IC-rated to prevent fire hazard. Check your ceiling cavity depth before buying, standard cans need 6 to 8 inches of space above the drywall.
Choosing the Right Fixture for Your Space
Your fixture choice depends on trim style, bulb type, and dimming capability. Trim finishes include chrome, white, and bronze: pick one that matches your décor and blends with existing hardware. Bulb options range from LED (most energy-efficient), CFL, to halogen or incandescent (phasing out). LED recessed bulbs are worth the upfront cost, they last 25,000+ hours, run cool, and save money on electricity.
Check the color temperature: 2700K delivers warm, yellow-toned light (living rooms, bedrooms): 4000K is neutral white (kitchens, offices): 5000K+ is cool (detailed task work). Home Depot staff can advise, but read the packaging because warm and cool lights feel totally different in a finished room.
If you want to dim your lights later, buy fixtures and bulbs rated for dimmer compatibility. Not all LEDs work with older dimmers, so buy dimmable LEDs if that’s in your future. Budget roughly $15–$40 per fixture at Home Depot, depending on quality and trim type. The housing (can) costs more than the trim ring: investing in good housings pays off in durability and light quality.
Measuring and Planning Your Layout
This is where patience wins. Measure your room length and width, note where furniture sits, and identify task areas (over the sink, reading corner, etc.). A rule of thumb: space cans 4 to 6 feet apart for even ambient lighting. For a 12-by-15-foot living room, you might install 6 to 8 fixtures: a 10-by-12-foot bedroom often needs 4 to 6.
Draw your ceiling layout on graph paper or use a free app, mark joists, HVAC ducts, plumbing, and existing electrical. Avoid running wiring directly over joists if possible: it’s tight and creates heat buildup. Mark fixture locations with chalk or painter’s tape on the ceiling itself before cutting holes. Stand under each marked spot and imagine the light, you’ll catch planning mistakes this way.
Consider Recessed Lighting Housing: A Comprehensive Guide to Brighten Your Space for deeper dives into housing specs. Measure the distance from the wall too: don’t place cans so close to walls that light pools awkwardly. A 2-foot offset from the wall is a safe minimum. Count your total fixtures and add 1–2 extras for spares: Home Depot accepts returns, so you can buy slightly extra and bring back unopened boxes.
Installation Basics: What You Need to Know
Before you start, know your limits: if you’re running new wiring from your breaker panel or cutting into load-bearing ceiling joists, call a licensed electrician. Most municipalities require a permit for any new electrical circuits, skipping this risks liability and fines. That said, adding fixtures to an existing circuit in an unfinished basement or attic is simpler.
Tools you’ll need: a stud finder, drywall saw (4–6 inches to match your can size), wire strippers, needle-nose pliers, a screwdriver, and a voltage tester. Safety first: shut off power at the breaker before touching any wiring, and always test wires with a voltage tester to confirm they’re dead. Wear safety glasses when cutting into drywall, dust and debris fly everywhere. If you’re working above your head in finished spaces, a dust containment system or plastic sheeting saves cleanup time.
Basic steps: (1) Mark and cut each drywall hole. (2) Fish wiring through the ceiling cavity and into the can housing. (3) Secure the housing with the provided brackets or screws, most hang from the joists. (4) Connect the fixture’s junction box to your power source. (5) Snap in the trim ring and install the bulb. How to Install Recessed Lighting provides solid step-by-step visuals if you need more detail. Don’t rush the electrical connections, poor crimps or loose connections cause flickering or fire hazards.
Learn more about Recessed Lighting: Enhance Your Home’s Aesthetics to explore aesthetic and efficiency benefits. Most installs take 1–2 hours per fixture in unfinished ceilings: finished drywall adds complexity and time.
Lighting Design Tips for Different Rooms
Kitchens need task and ambient light. Place 4–6 cans overhead for general illumination, then add under-cabinet LEDs (or a separate track fixture) for countertop work. Installing Under Cabinet Lighting walks through that add-on. Recessed lights alone aren’t enough over a sink, you’ll cast shadows with your body.
Living rooms and bedrooms benefit from fewer, well-spaced cans plus dimmers. Aim for 2700K (warm) bulbs and space fixtures 5–6 feet apart for layered, cozy lighting. Add a separate wall sconce or table lamp for reading zones.
Bathrooms need bright, even light around mirrors. Install 4-inch cans flanking the mirror horizontally, or use a 6-inch fixture centered above it. 4000K neutrals feel clean without the harshness of 5000K. Bathrooms get moisture, so buy vapor-tight or IC-rated and moisture-rated fixtures: Home Depot clearly marks these.
Hallways and entryways often work with 1–2 cans spaced 6–8 feet apart. Dimmer control here adds comfort during nighttime trips. Track Lighting Home Depot is worth exploring if you want a flexible alternative. For accent lighting over art or shelving, adjustable trim cans and 2700K warm light create depth without glare.
Conclusion
Recessed lighting from Home Depot offers flexibility, clean looks, and solid value when you plan and install correctly. Start with your layout on paper, verify fixture specs against your ceiling cavity, pick appropriate trim and bulb types, and don’t skip electrical safety. Whether you handle the whole job or call in an electrician for the wiring, taking time upfront saves headaches and rework later. Once your fixtures are in, a well-lit room feels bigger, smarter, and more functional, the payoff is worth the effort. Recessed lighting design fundamentals from trusted sources reinforce what you’ll learn here. Get it right, and you’ll enjoy reliable, modern lighting for years.

